I get this question very often, so I decided to write a blog post about it: “How can I migrate my Oracle Database to Exascale with minimal downtime and a reliable fallback option?”
And my answer is Refreshable Clone PDBs and AutoUpgrade.
Before we begin, let me clarify a few things.
If you prefer to stay on 19c and only move your database to Exascale, you can still use this technique. The only difference is that AutoUpgrade will skip the upgrade to 26ai and perform only the migration.
One thing to keep in mind: if you run 19c on Exascale, you won’t benefit from Exadata-specific features such as Smart Scans. However, you will still enjoy excellent IOPS performance.
If your source database is non-CDB, you can also use this technique. AutoUpgrade will handle the conversion and create a PDB for you automatically.
You can use this technique to migrate your on-premises Oracle Databases running on commodity hardware, Exadata, ODA, or PCA. It also works for databases running in any cloud—including OCI Database Cloud services such as BaseDB, Oracle Exadata Database Service (ExaCC and ExaCS), etc.
You can use this technique regardless of the size of your database — we have customers with hundreds of terabytes using it successfully.
Can I use this technique if my source database is Standard Edition?
I don’t have an official statement confirming it yet, but I tested the process, and everything worked as expected. I have another blog post about it.
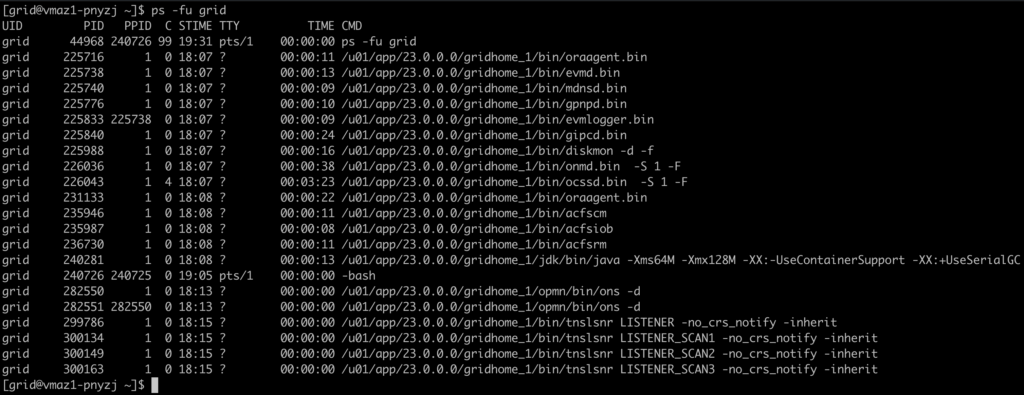
Since Oracle AI Database 26ai on Exascale does not use ASM, you might be curious to see what processes are running under the grid user:
How To
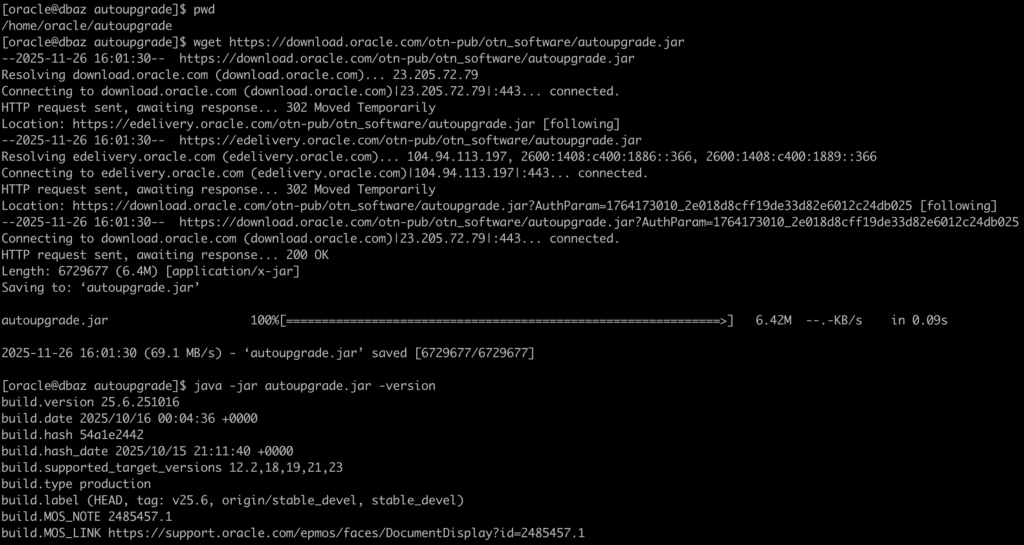
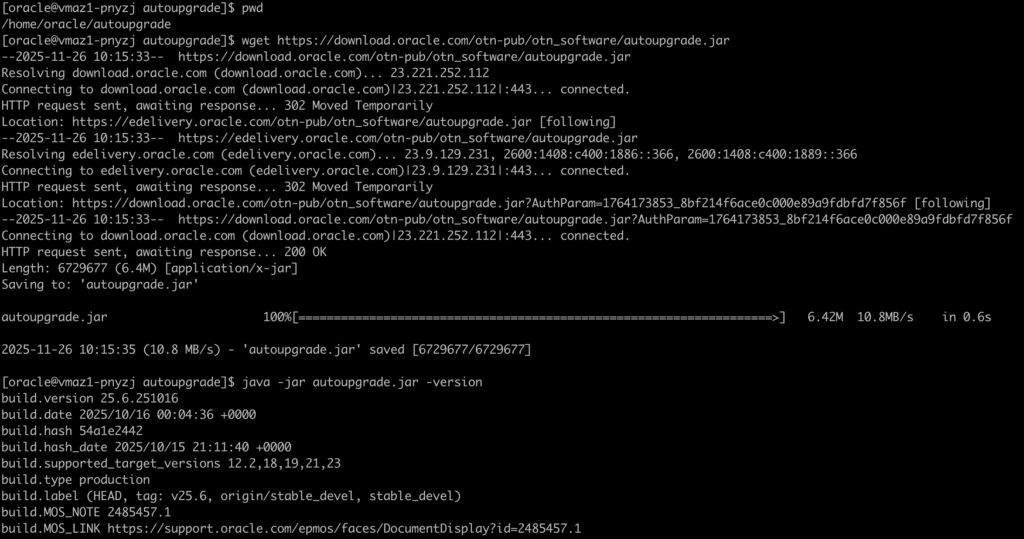
1 – Download the latest Oracle AutoUpgrade version to both servers
wget https://download.oracle.com/otn-pub/otn_software/autoupgrade.jar2 – In the source Database non-CDB or PDB, create a user:
create user dblinkuser identified by ... ;
grant create session, create pluggable database, select_catalog_role to dblinkuser;
grant read on sys.enc$ to dblinkuser;
3 – Create a database link on the target database (ExaDB-XS CDB 26ai) connecting to the source database:
create database link clonepdb connect to dblinkuser identified by ... using 'source-db-alias';4 – Create an AutoUpgrade config file:
global.autoupg_log_dir=/home/oracle/autoupgrade
global.keystore=/home/oracle/autoupgradekeystore

upg1.source_home=/u01/app/oracle/product/19.0.0/dbhome_1
upg1.target_home=/u02/app/oracle/product/23.0.0.0/dbhome_1

upg1.sid=DB19C
upg1.pdbs=PDBAZ
upg1.target_cdb=ORCLXS1
upg1.source_dblink.PDBAZ=DB19C 60
upg1.target_pdb_copy_option.PDBAZ=file_name_convert=none

upg1.start_time=28/11/2025 23:30:00
If you need more details about the parameters, check it here and you can also use the AutoUpgrade composer.
5 – Start AutoUpgrade in analyze mode on the source system:
java -jar autoupgrade.jar -mode analyze -config myconfig.cfg6 – Run AutoUpgrade in fixups mode on the source system:
java -jar autoupgrade.jar -mode fixups -config myconfig.cfg7 – Run AutoUpgrade in deploy mode in the target system:
java -jar autoupgrade.jar -mode deploy -config myconfig.cfgOne recommendation for real-world cases is to use this parameter to constrain the number of parallel execution servers to use when creating a PDB:
upg1.parallel_pdb_creation_clause.<source PDB>=<integer>Step by Step – 19c PDB to 26ai PDB
Download the latest Oracle AutoUpgrade version to both servers:
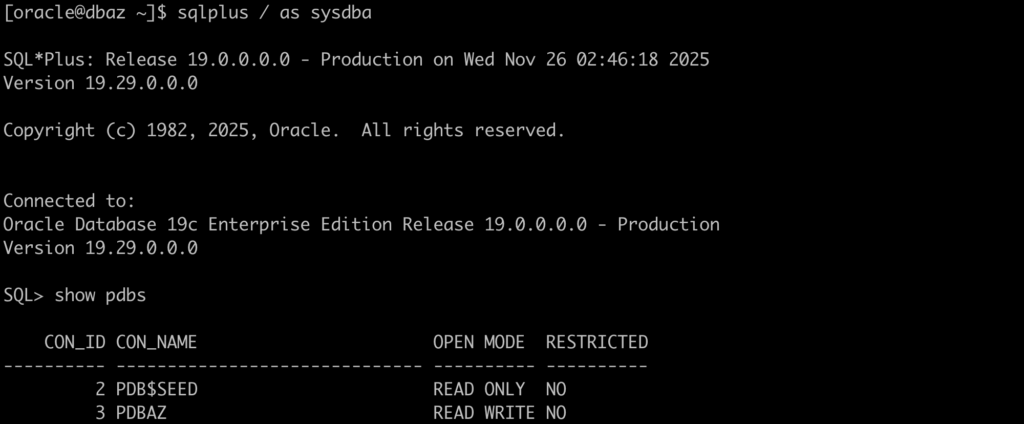
Source database info (19c):
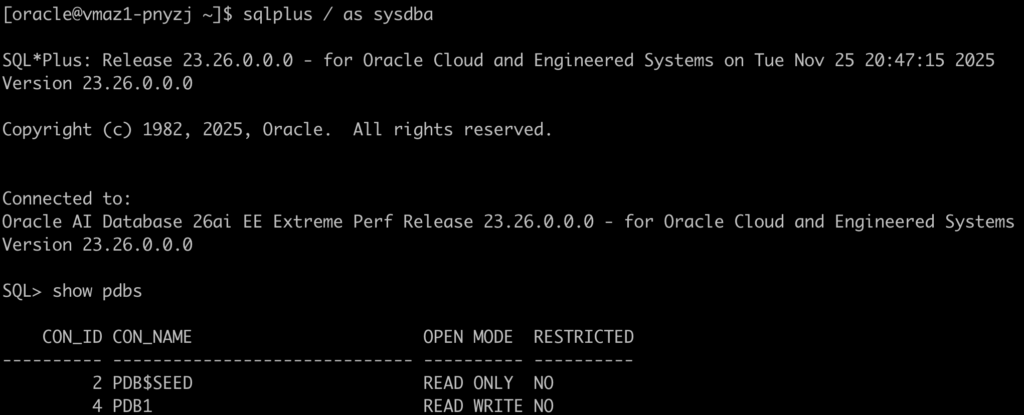
Target database info (ExaDB-XS 26ai):
Let’s create a user on the CDB$ROOT (19c) with the right privileges:
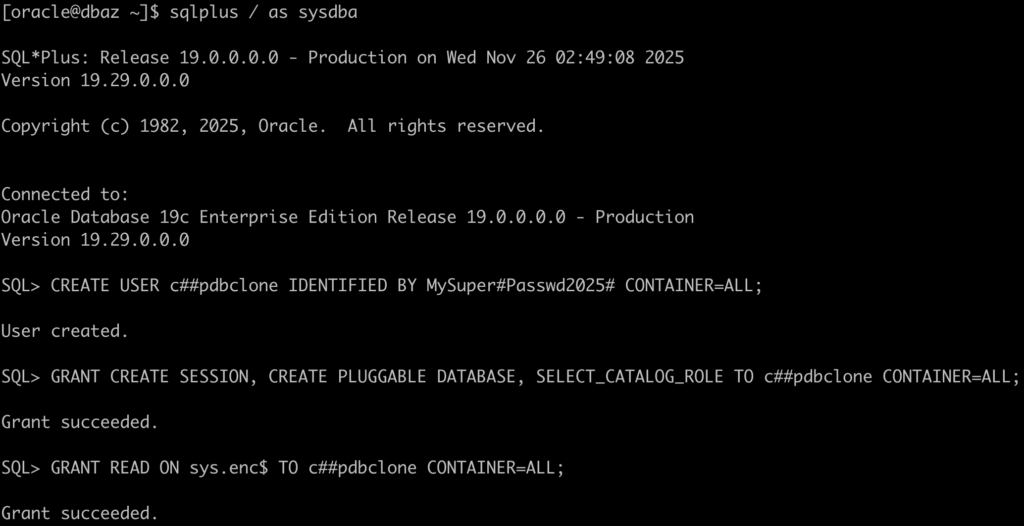
Let’s create the database link on 26ai on the CDB$ROOT pointing to the 19c:

If you face issues with the database link (ORA-02085), please check the parameter global_names.
Let’s create an AutoUpgrade config file on the source database (19c) to run the analyze mode:
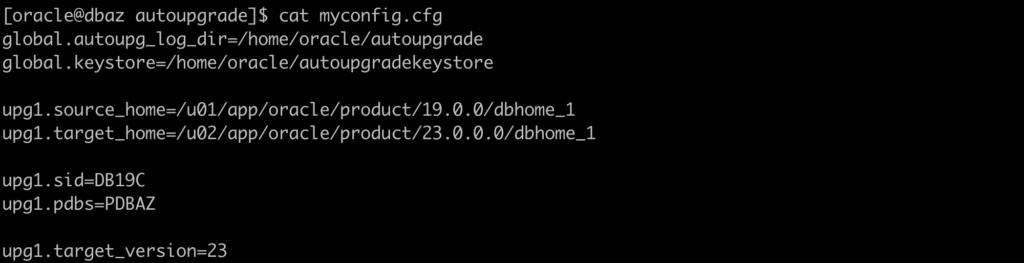
You may recognize that I specify a target_home that does not exist on this server. But this will be ignored.
Let’s run the Analyze mode in the source database (19c):
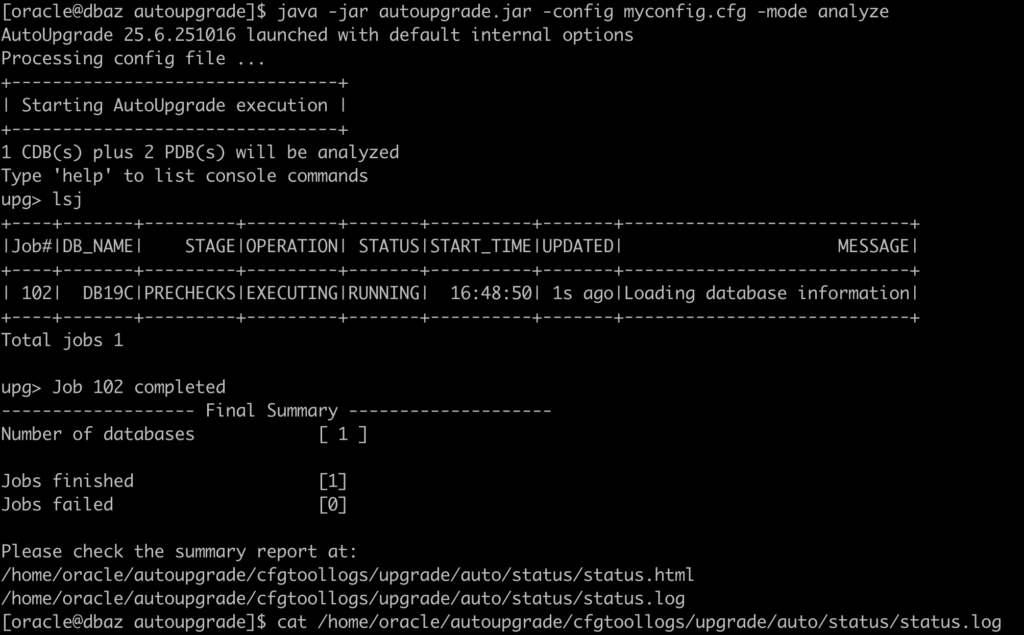
As you can see, for this test, no manual steps are needed:
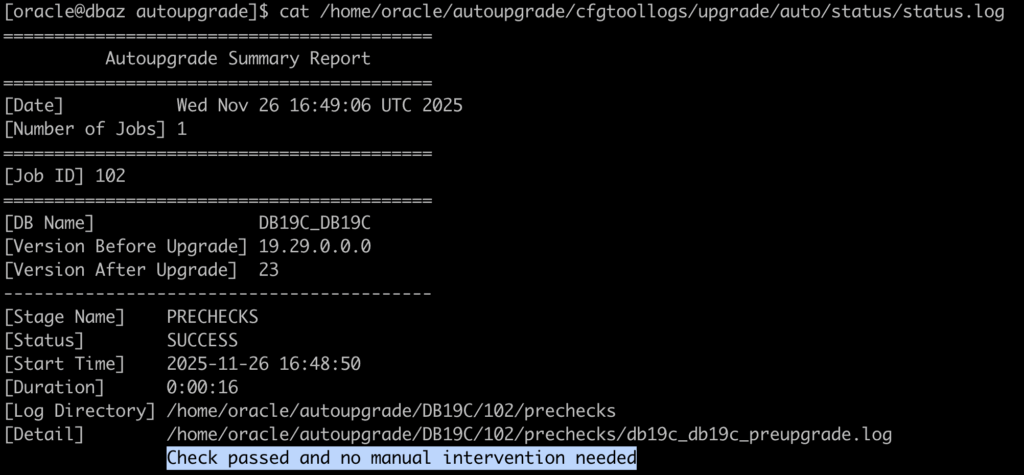
If any issues are reported, run AutoUpgrade in fixups mode or resolve them manually. After that, rerun the analyze mode to confirm everything is correct.
Let’s create an AutoUpgrade config file on the target database (ExaDB-XS – 26ai):
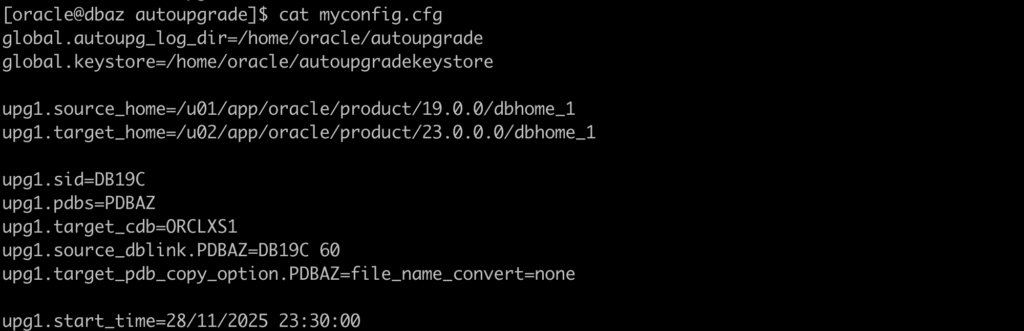
Since the upgrade is scheduled for the weekend and I plan to build the PDB early — and because it will refresh every 60 seconds to keep it synced with my production 19c database — I set the start_time parameter to a future value. I can adjust it later as needed.
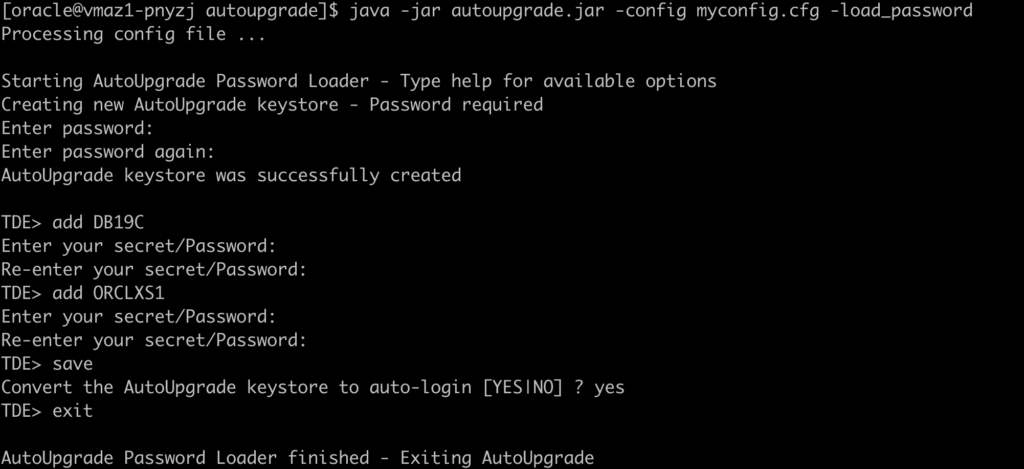
Let’s load the TDE encryption password on the target database(ExaDB-XS – 26ai):
Let’s run the Deploy mode to start building the pdb on ExaDB-XS 26ai:
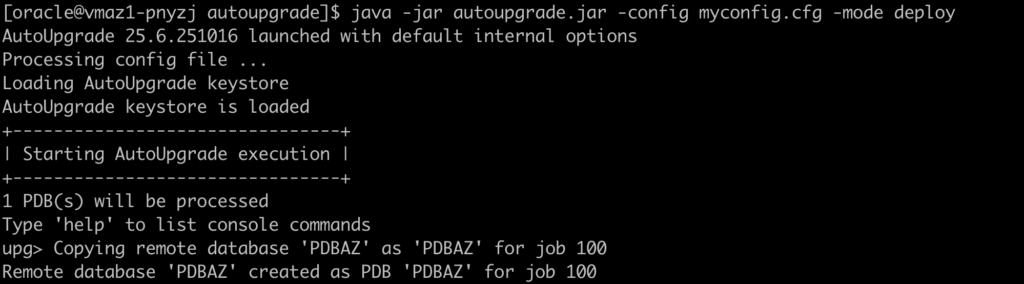
As you can see, the PDBAZ is now created on my ExaDB-XS 26ai system, and it’s refreshing with data from the 19c source every 60 seconds:

The final refresh and database upgrade is scheduled for a later date:

You can change the start time at any moment. If you want to perform the final refresh and continue immediately, use the proceed command.
proceed -job 100Or, you can change the start time:
proceed -job 100 -newStartTime 26/11/2025 11:00:00Or, you can change the start time to a relative value, for example, 1 hour 30 minutes from now:
proceed -job 100 -newStartTime +1h30mI will use the proceed command to start it now:
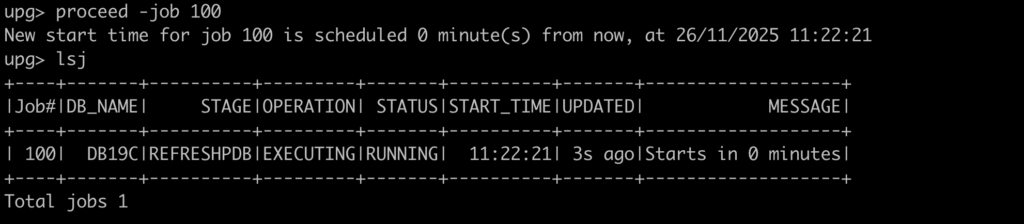
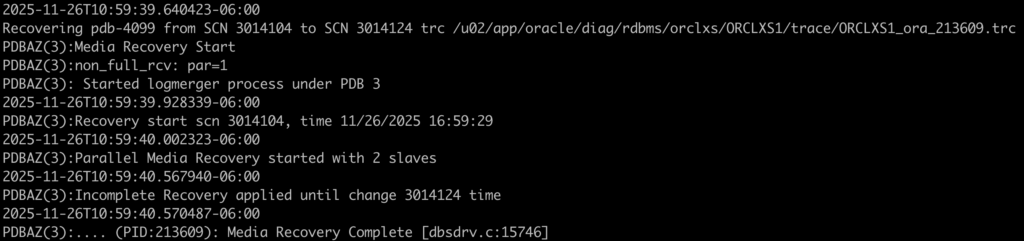
The latest refresh has completed, and AutoUpgrade is now performing the upgrade to 26ai:


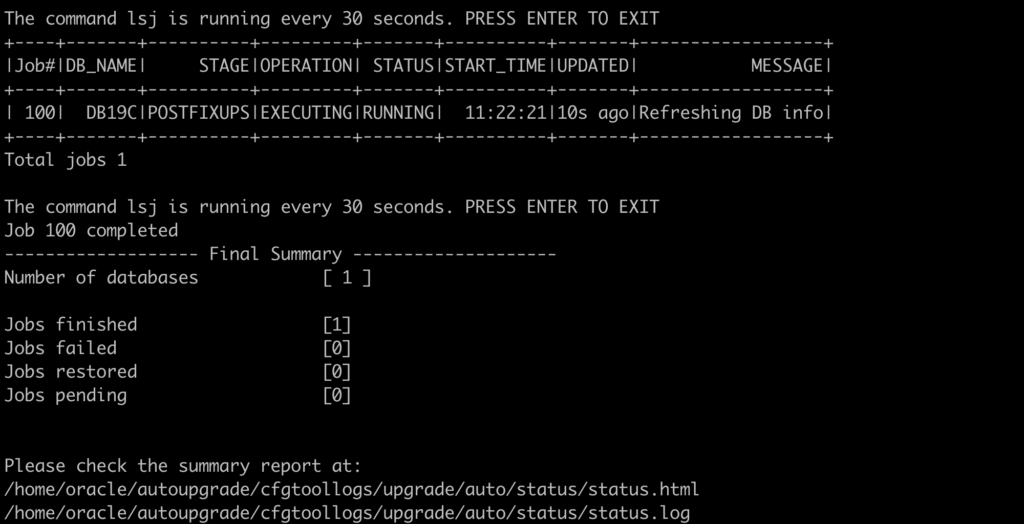
The upgrade finished:
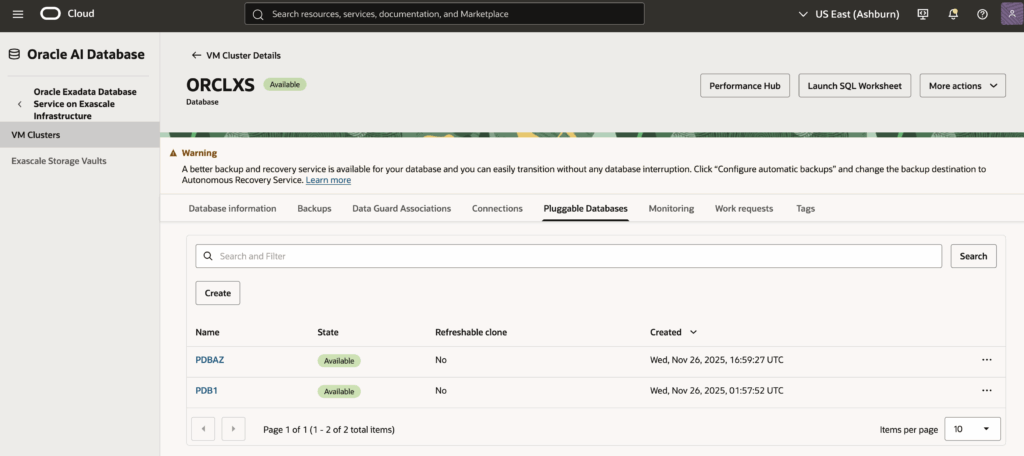
As you can see, PDBAZ is now running on ExaDB-XS 26ai, and it also remains available on the 19c system in case anything happens and we need to roll back the migration.


Will the console recognize the new PDB?
And the answer is: Yes
It took a few minutes, but it’s there now:
It’s also documented on MOS: 19c ASM to 23ai Exascale Direct Migration using AutoUpgrade via Refreshable Clone (Doc ID 3086805.1)